Hosting Websites on GitHub
Last updated on 2025-11-11 | Edit this page
Overview
Questions
- “How do I publish my page or a website on the Web via GitHub?”
Objectives
- “Publish on the Web with GitHub Pages”
GitHub has a service for making content available online called GitHub Pages.
Publishing a Website With GitHub Pages
GitHub Pages is a free website hosting service by GitHub that takes files (Markdown, HTML, CSS, JavaScript, etc.) from your GitHub repository which is configured as a website, optionally runs the files through a build process, combines them and publishes them as a website. Any changes you do to the files in your website’s GitHub repository will be rendered live in the website.
There are other services available to create and publish websites but one of the main advantages of GitHub Pages is that you can version control your website and therefore keep track of all your changes. This is particularly helpful for collaborating on a project website. GitLab, Codeberg, Sourcehut and BitBucket offer similar services.
Let’s continue from the GitHub repository we have created in the
previous episode. One important file you should already have is
README.md, which will become the homepage of your project
website.
Enabling GitHub Pages
In order to tell GitHub that your repository contains a website that needs rendering you need to configure GitHub Pages settings. You can do so from your repository’s Settings page, as explained below.
You may have noticed that when we created our repository in previous
episode, by default GitHub created a branch called main and
stored our files there. We now need to tell GitHub Pages that this
branch contains our website files.
What Is a Branch?
You may have never heard about Git branches and wonder what they are.
A branch is one version of your project (the files in your repository)
that can contain its own set of commits - you can have many branches
(versions) of your repository. The default branch automatically created
with a new github repository is called main.
-
Click on the repository’s
Settingstab (the one with the little cog/gear icon) as shown on the figure below: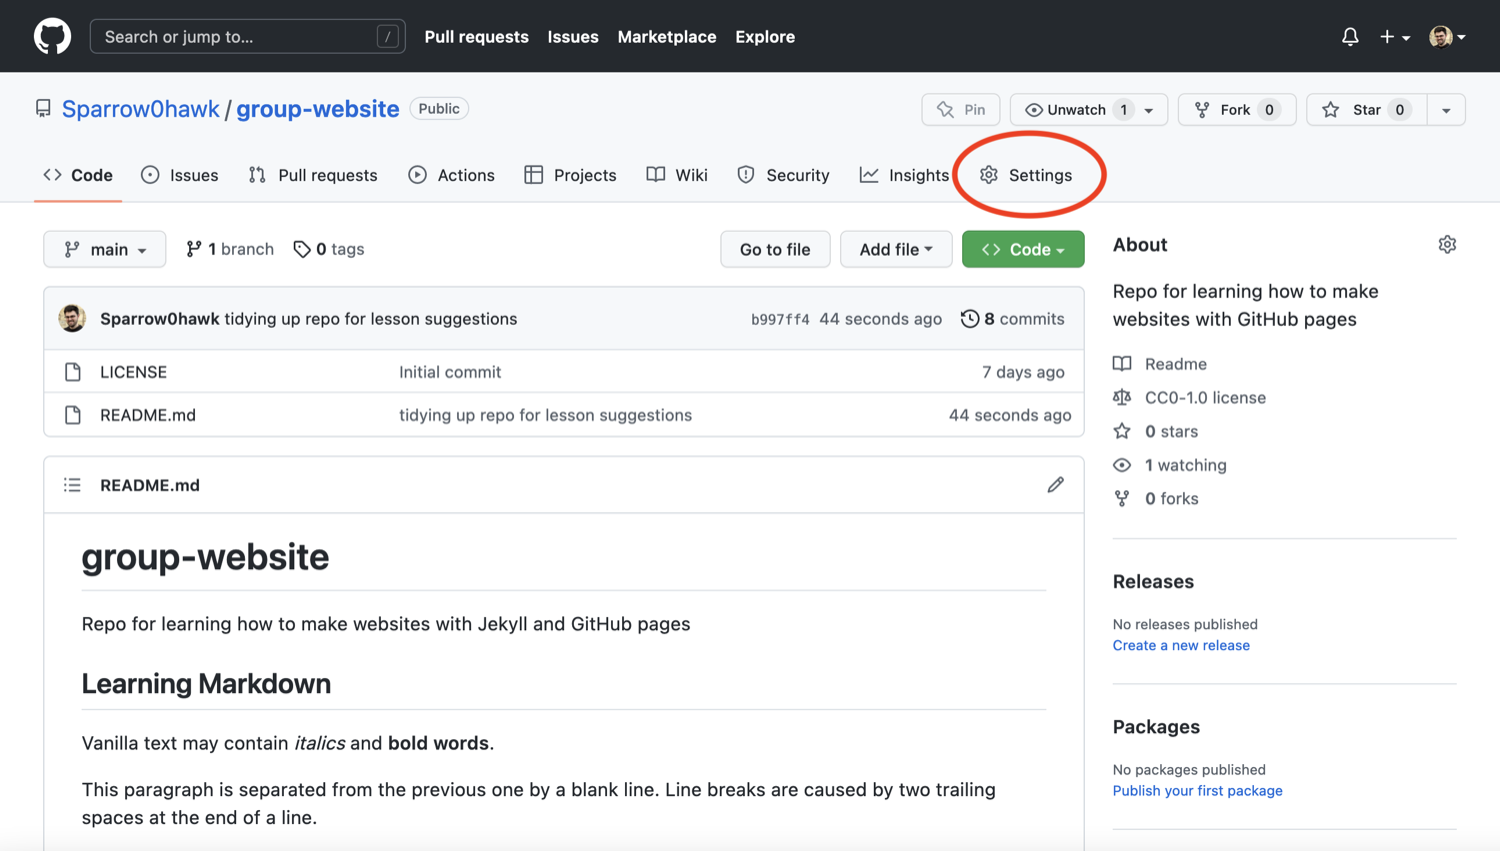 Repository ‘Settings’ button in GitHub interface
 -
On the menu on the left hand side, click on
Pages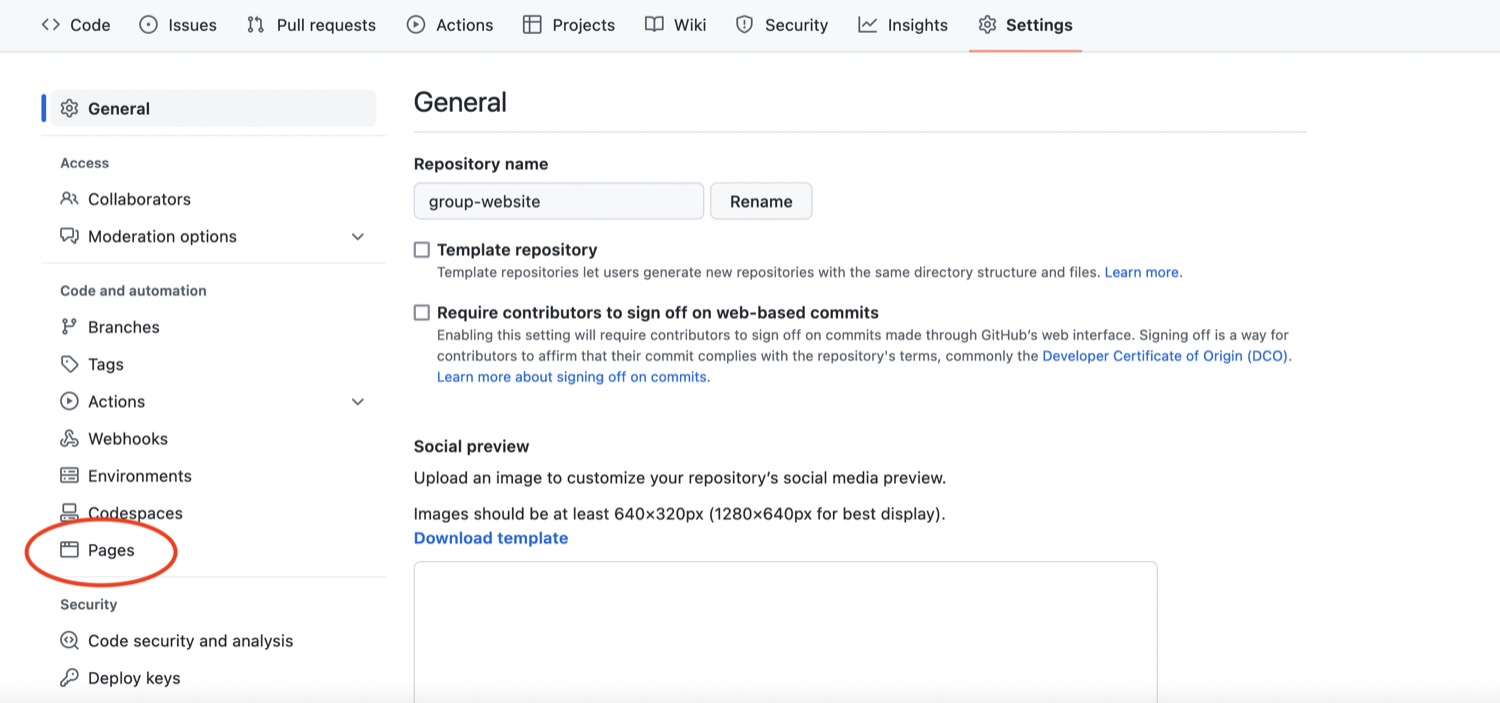 Select ‘Pages’ tab in repository settings
 -
You will see that the GitHub Pages settings are currently disabled. Select branch
mainto tell GitHub which branch to use as a source and clickSaveto enable GitHub Pages for this repository.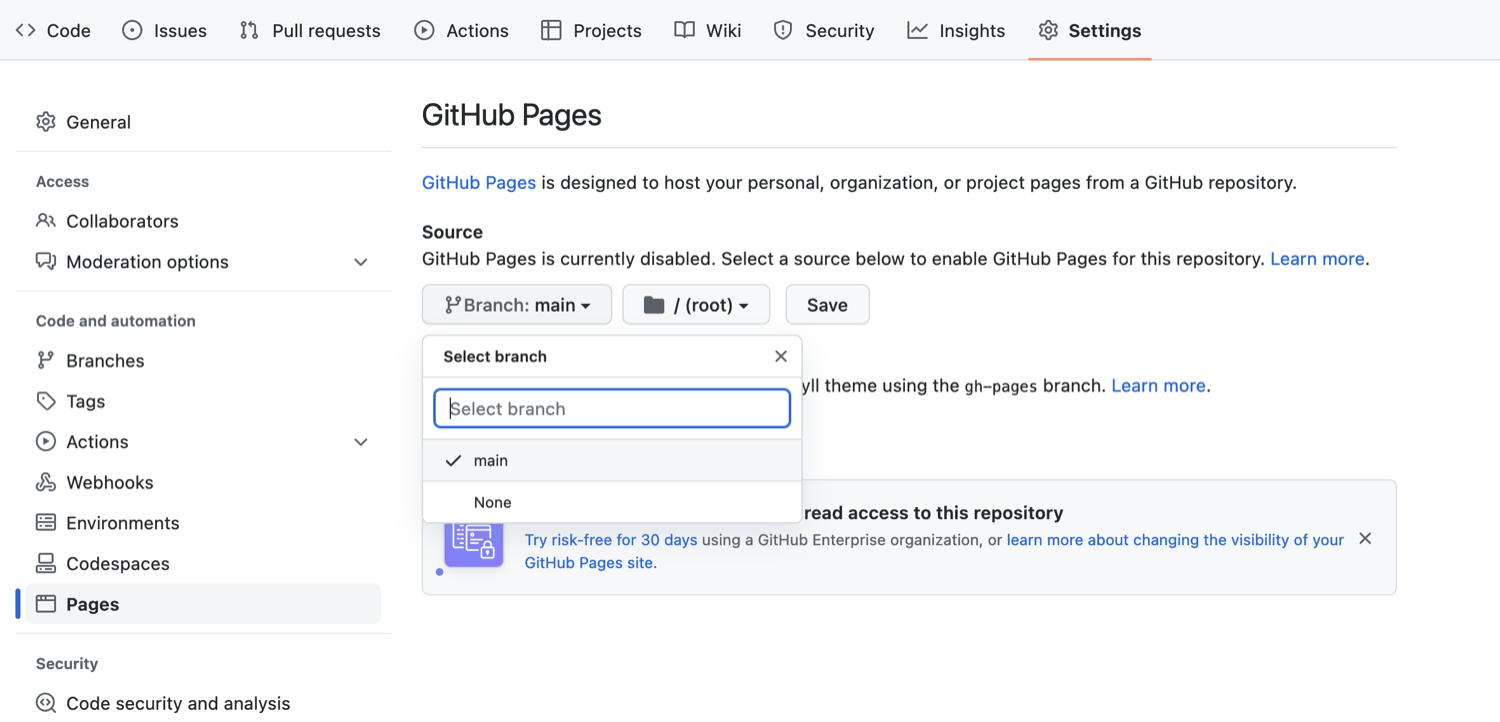 Set default branch for the website in repository settings
 -
The link to your repository’s website will appear in the highlighted box above. If you click the link - your default browser will open and show your project website. If this does not happen, you should manually open your favourite web browser and paste the URL.
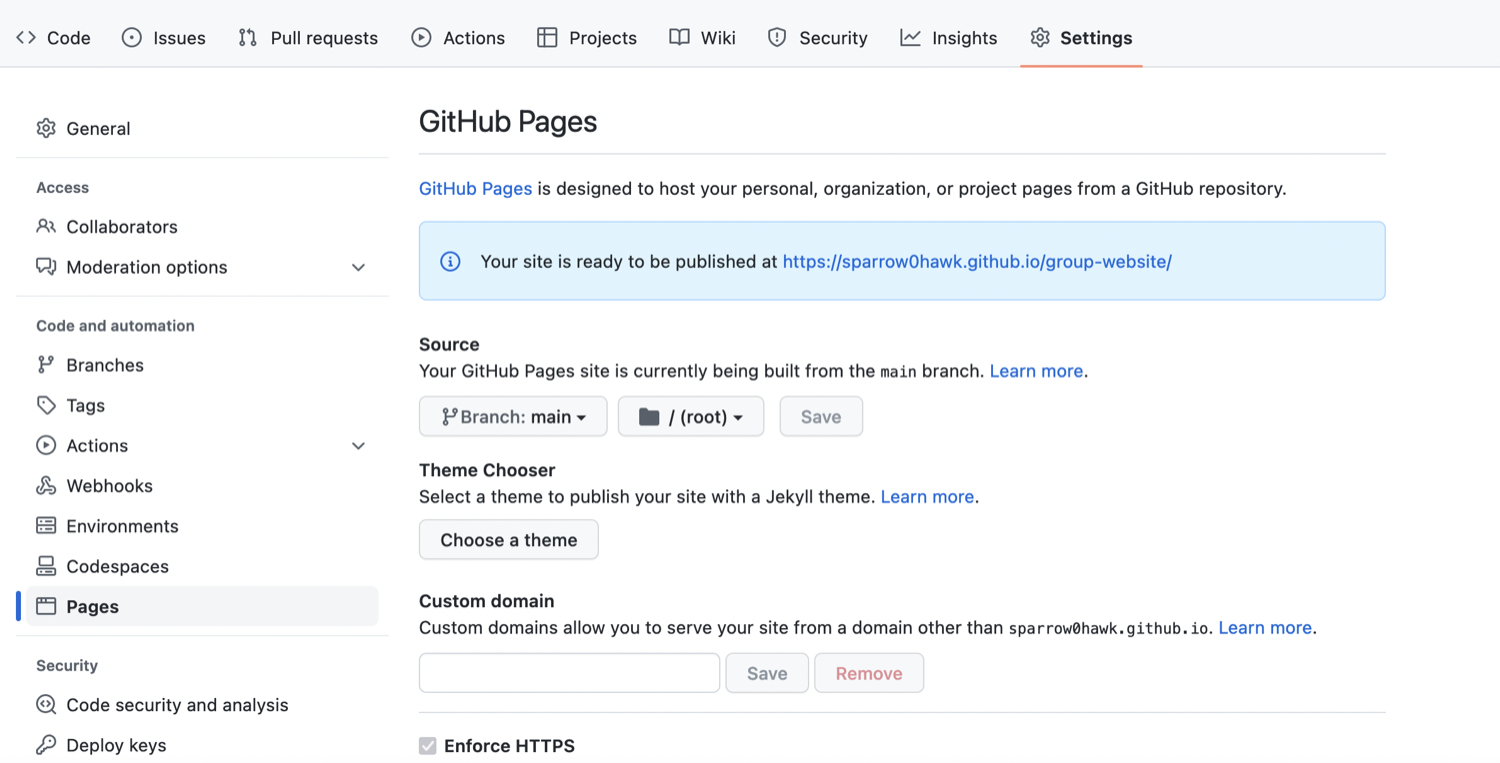 URL where the project website will be published by GitHub Pages
 -
It may take a while (from a few seconds to a few minutes) for GitHub to compile your website (depending on GitHub’s availability and the complexity of your website) and it may not become visible immediately. You will know it is ready when the link appears in green box with a “tick” in front of the web address (as shown in the figure below).
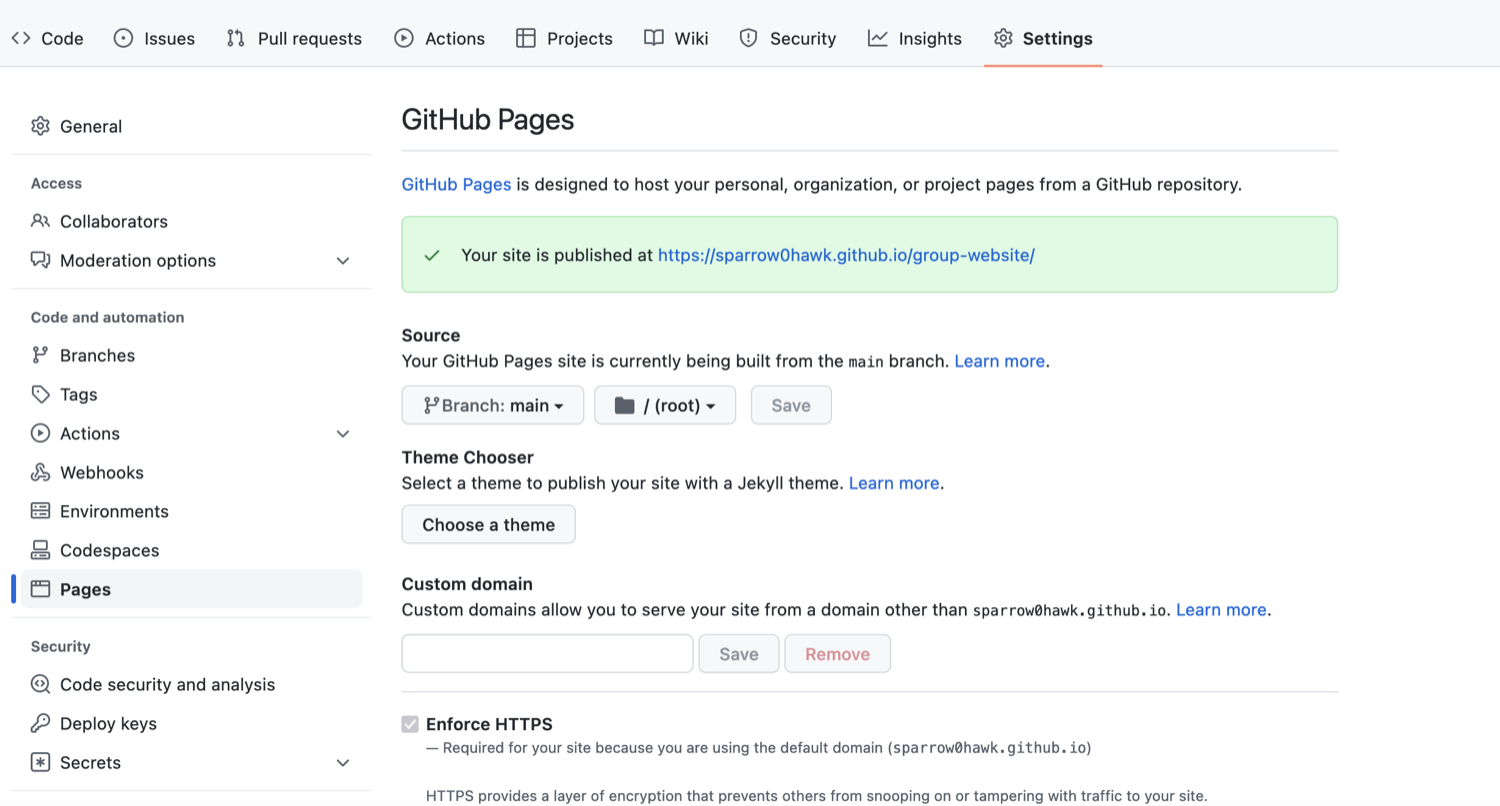 Project website URL - indication of a successful build
 -
Once ready, you should see the contents of the
README.mdfile that we created earlier, rendered as a website.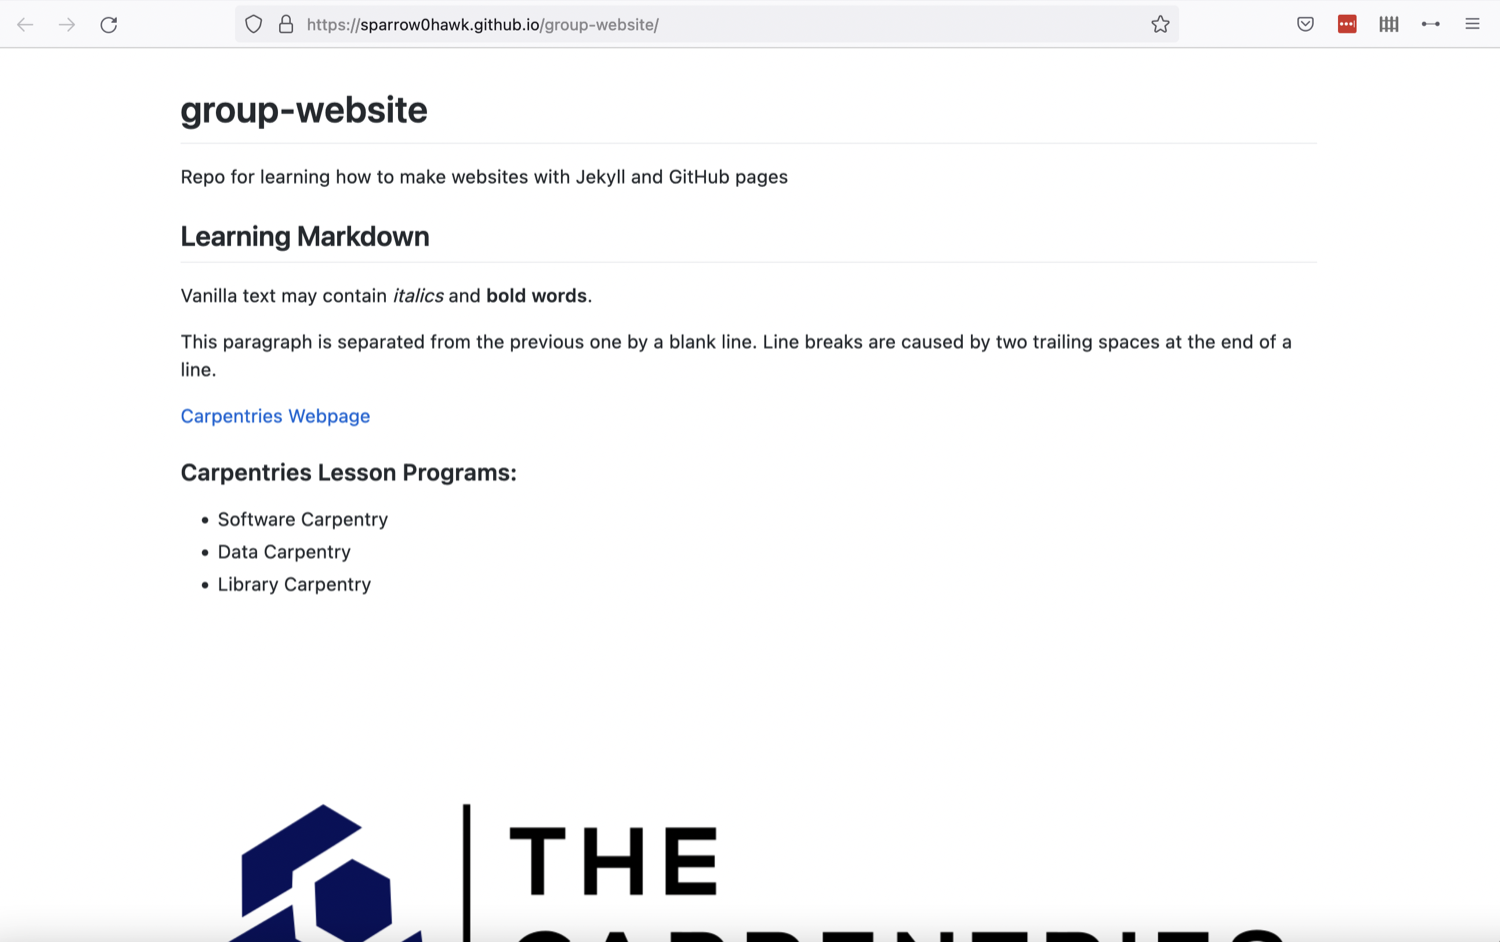 Our first website rendered by GitHub and showing the contents of README
Using Branch gh-pages for
Websites
By convention, GitHub Pages uses branch called gh-pages
to look for the website content. By creating a branch with that name,
you implicitly tell GitHub that you want your content published and you
do not need to configure GitHub Pages in Settings. Once you
create gh-pages from your current branch (typically
main, created by default when you created the repository),
you can then choose to delete the other branch to avoid any confusion
about where your content is stored.
Either of the above two approaches to turning a repository to a
website will give you the same result - the gh-pages
approach is perhaps more common as it favours convention over
configuration.
Understanding GitHub Pages’ URLs
You may have noticed a slightly strange URL for your website appearing in that green box with a “tick” in front of it. This URL was generated by GitHub Pages and is not random. It is formatted as ‘https://GITHUB_USERNAME.github.io/REPOSITORY_NAME’ and is formed by appending:
- your GitHub username or organisation name under which the repository is created (GITHUB_USERNAME)
- ‘.github.io/’ (GitHub’s web hosting domain)
- the repository name (REPOSITORY_NAME)
Because the repository name is unique within one’s personal or organisational GitHub account - this naming convention gives us a way of neatly creating Web addresses for any GitHub repository without any conflicts.
Customising Domain
GitHub Pages supports using custom domains, or changing your site’s URL from the default ‘https://GITHUB_USERNAME.github.io/REPOSITORY_NAME’ to any domain you own. Check out the documentation on configuring a custom domain for your GitHub Pages site.
Making Your Pages More Findable
On the right hand side of your repository on GitHub, you can see the
details of your repository under ‘About’. It is good practice to update
your repository details with a brief description. This is also a place
where you can put your repository’s Web URL (as not everyone will have
access to your repository’s Settings to find it) and add
descriptive topics or tags about the content or technologies used in
your repository or project.
You can edit the details of your repository by clicking on the little cog/gear button as shown on the figure below.
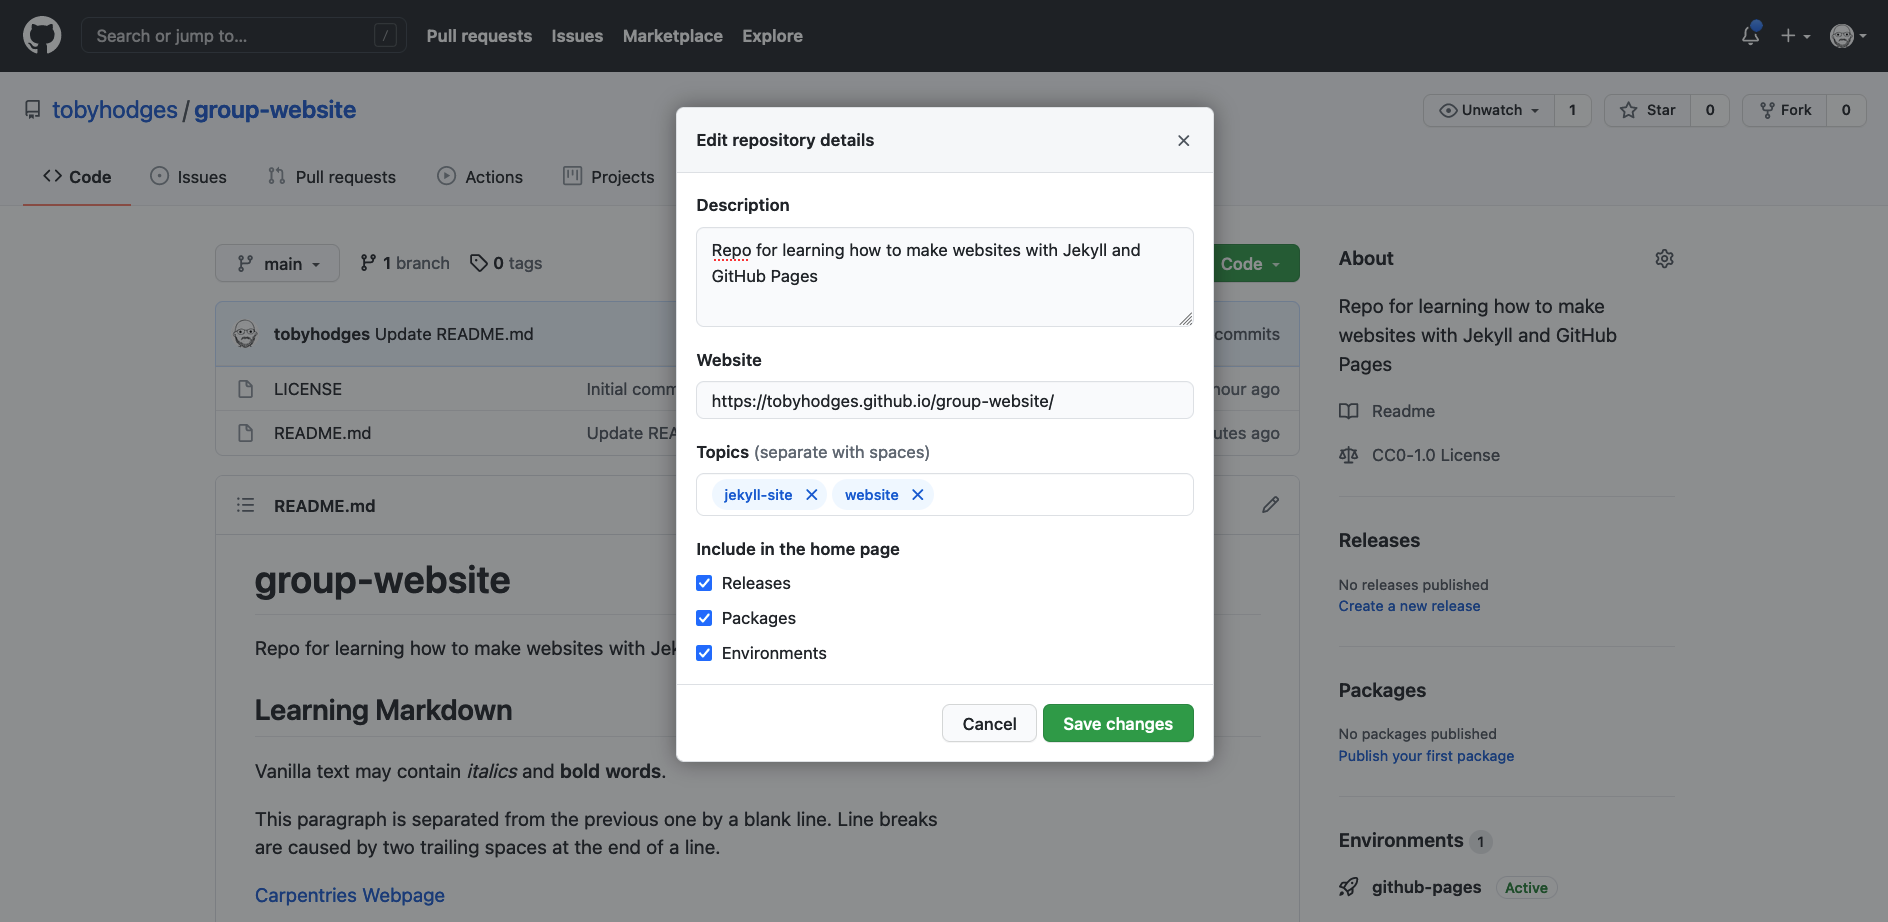
By doing this, you add a link to the repository’s website on your repository’s landing page and anyone (including yourself) can access it quickly when visiting your GitHub repository.
- “GitHub Pages is a static site hosting service that takes files in various formats (Markdown, HTML, CSS, JavaScript, etc.) straight from a repository on GitHub, builds them into a website, and publishes them on the Web”
- “By convention, if you create a branch called
gh-pagesin your repository, it will automatically be published as a website by GitHub” - “You can configure any branch of a repository to be used for website
(it does not have to be
gh-pages)” - “GitHub publishes websites on special URLs formatted as ‘https://GITHUB_USERNAME.github.io/REPOSITORY_NAME’”