Introduction Hello, World!
Figure 1
Let’s write a more complex HTML example using a table showing the
“Hello, World!” text in different languages that renders like: 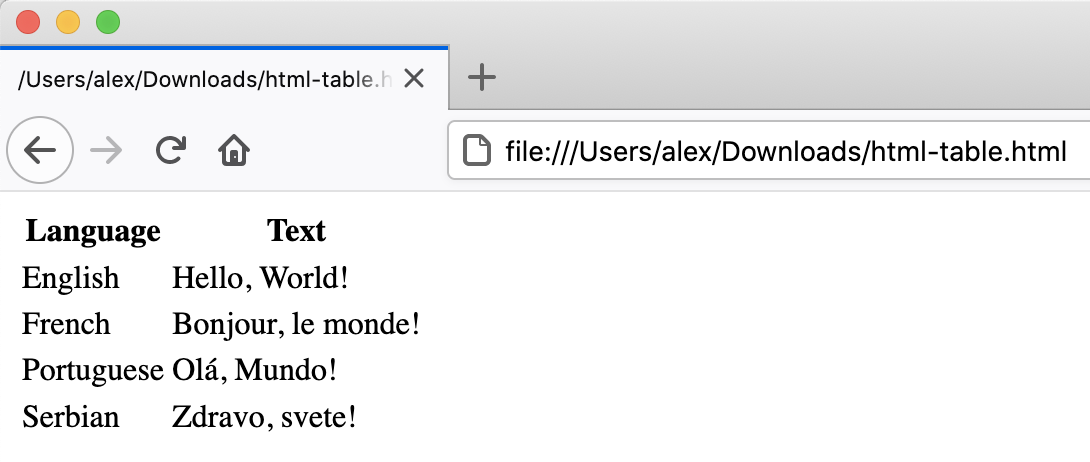 {:
.image-with-shadow width=“600px” }
{:
.image-with-shadow width=“600px” }
Figure 2
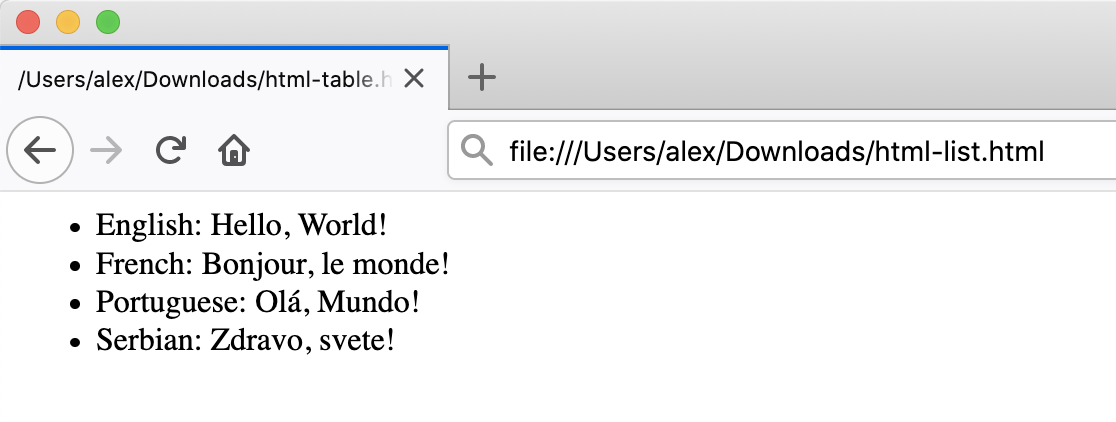
A similar example written using HTML lists would look as follows:
 {:
.image-with-shadow width=“600px” }
{:
.image-with-shadow width=“600px” }
Figure 3

Pages can be created in several ways: static
server-side generation (where HTML is generated once on the server and
doesn’t change thereafter), dynamic server-side generation (where the
server can update and send new HTML based on requests from the user’s
browser), and client-side generation (where parts of HTML pages are
generated by the browser using Javascript code)
Figure 4

Static websites in GitHub Pages technology
overview diagram
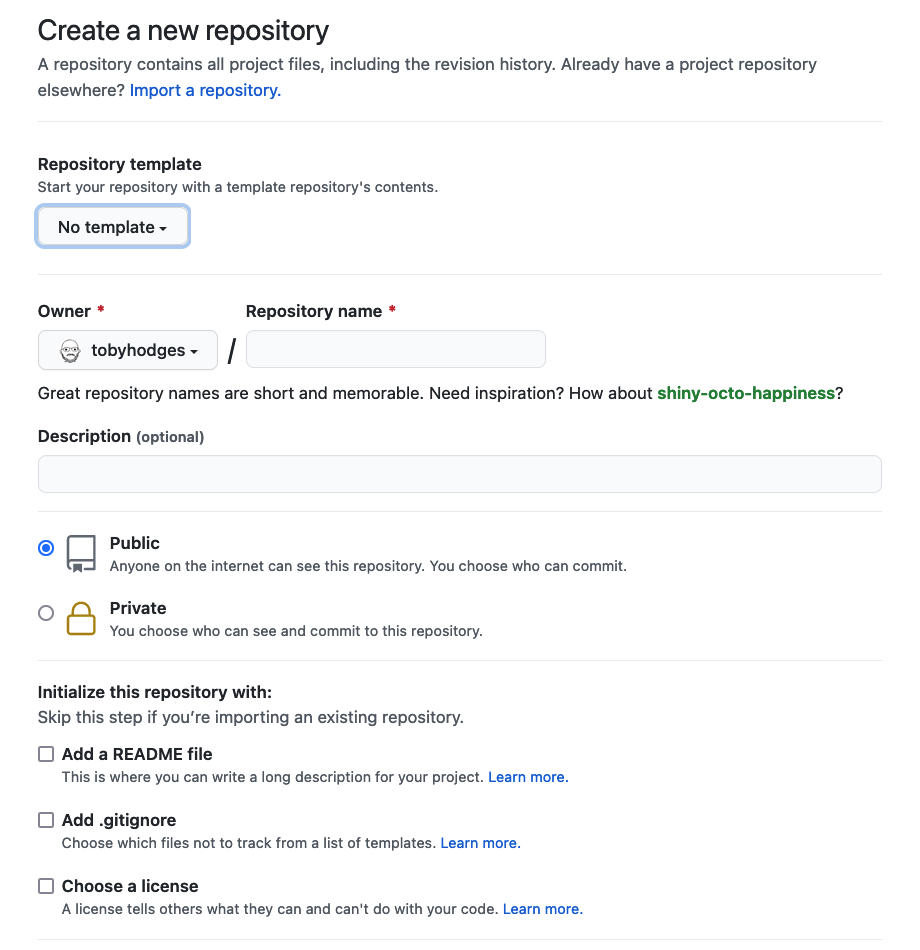
Figure 5

New repository button
Figure 6
 {:
.image-with-shadow width=“200px” }
{:
.image-with-shadow width=“200px” }
Figure 7
Blank new repository page
Figure 8
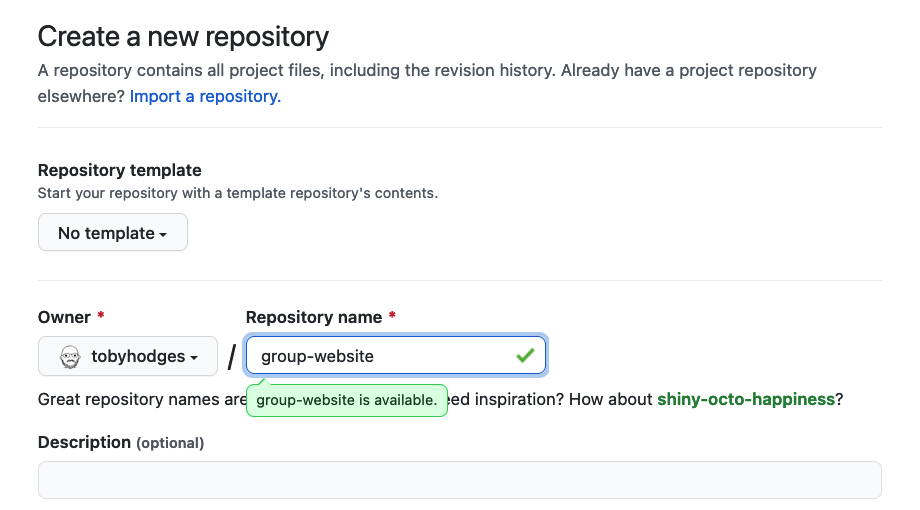
New repository - set name to group-website
Figure 9

New repository - set description
Figure 10
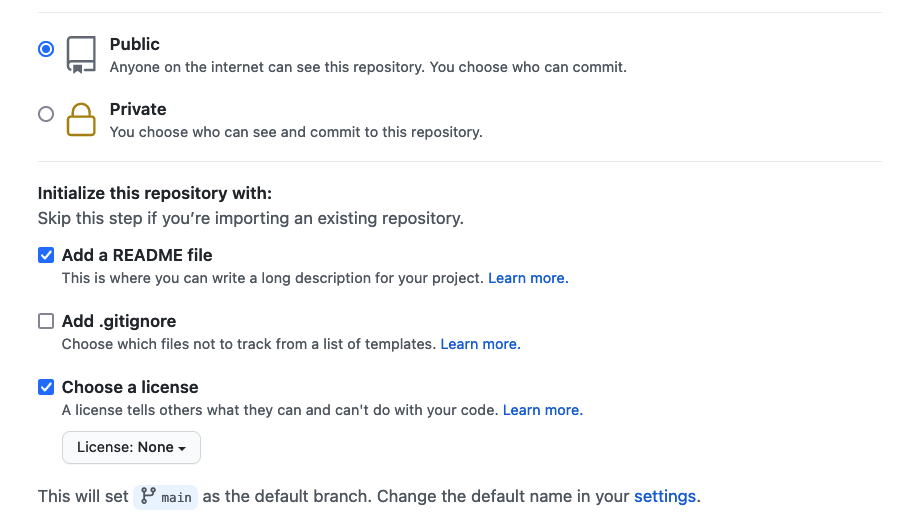
Initialise a new repository with a README and a
licence file
Figure 11
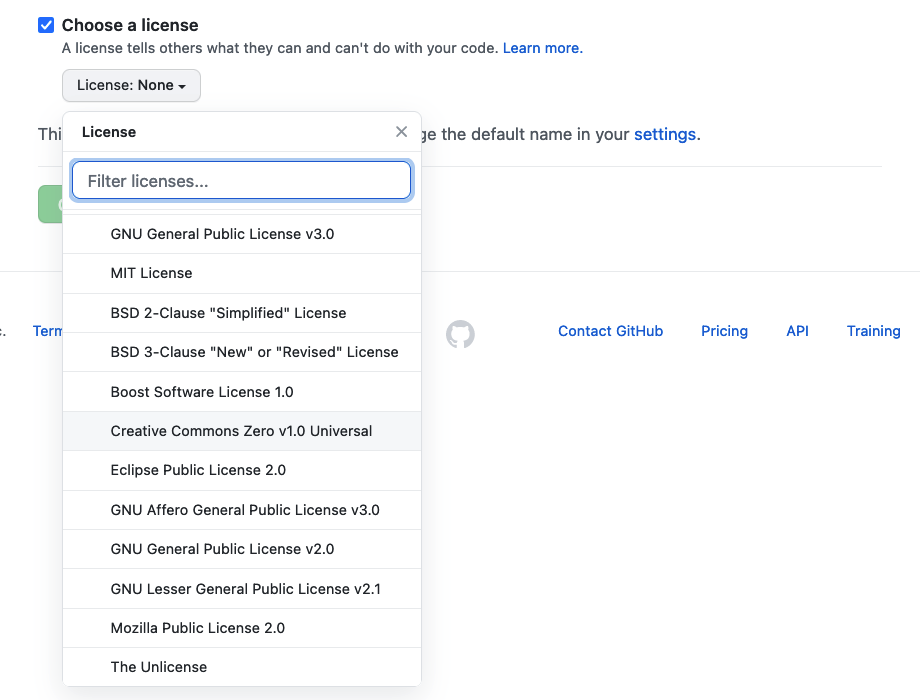
Set licence to CC0
Figure 12
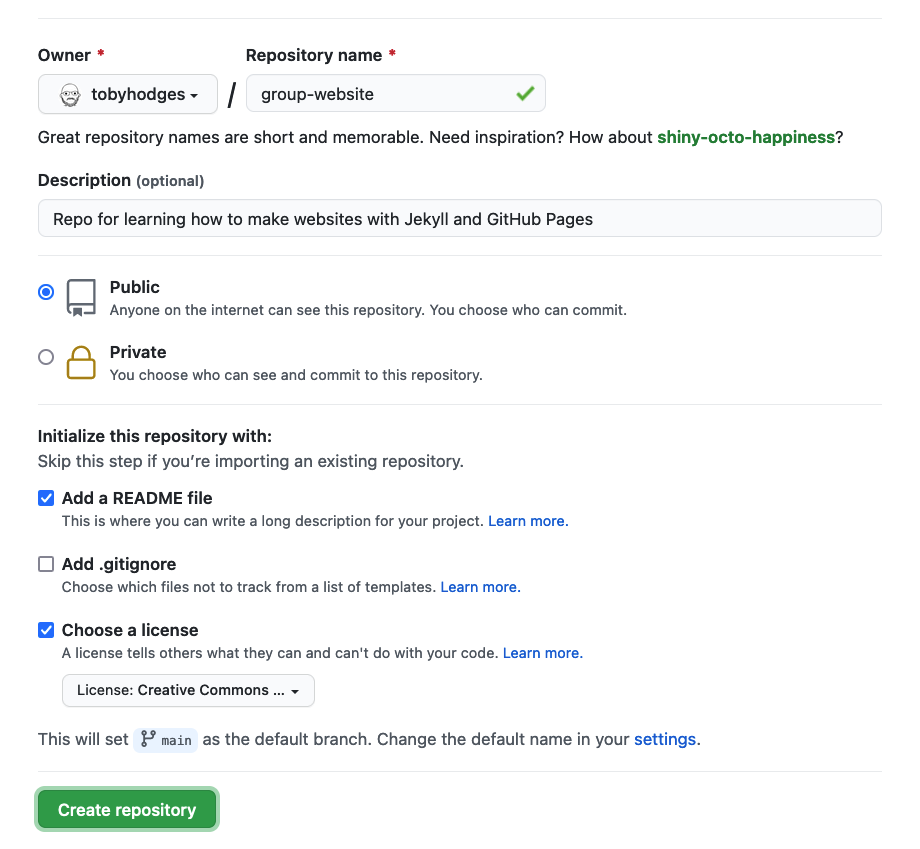
Filled in form with a create repository
button
Figure 13
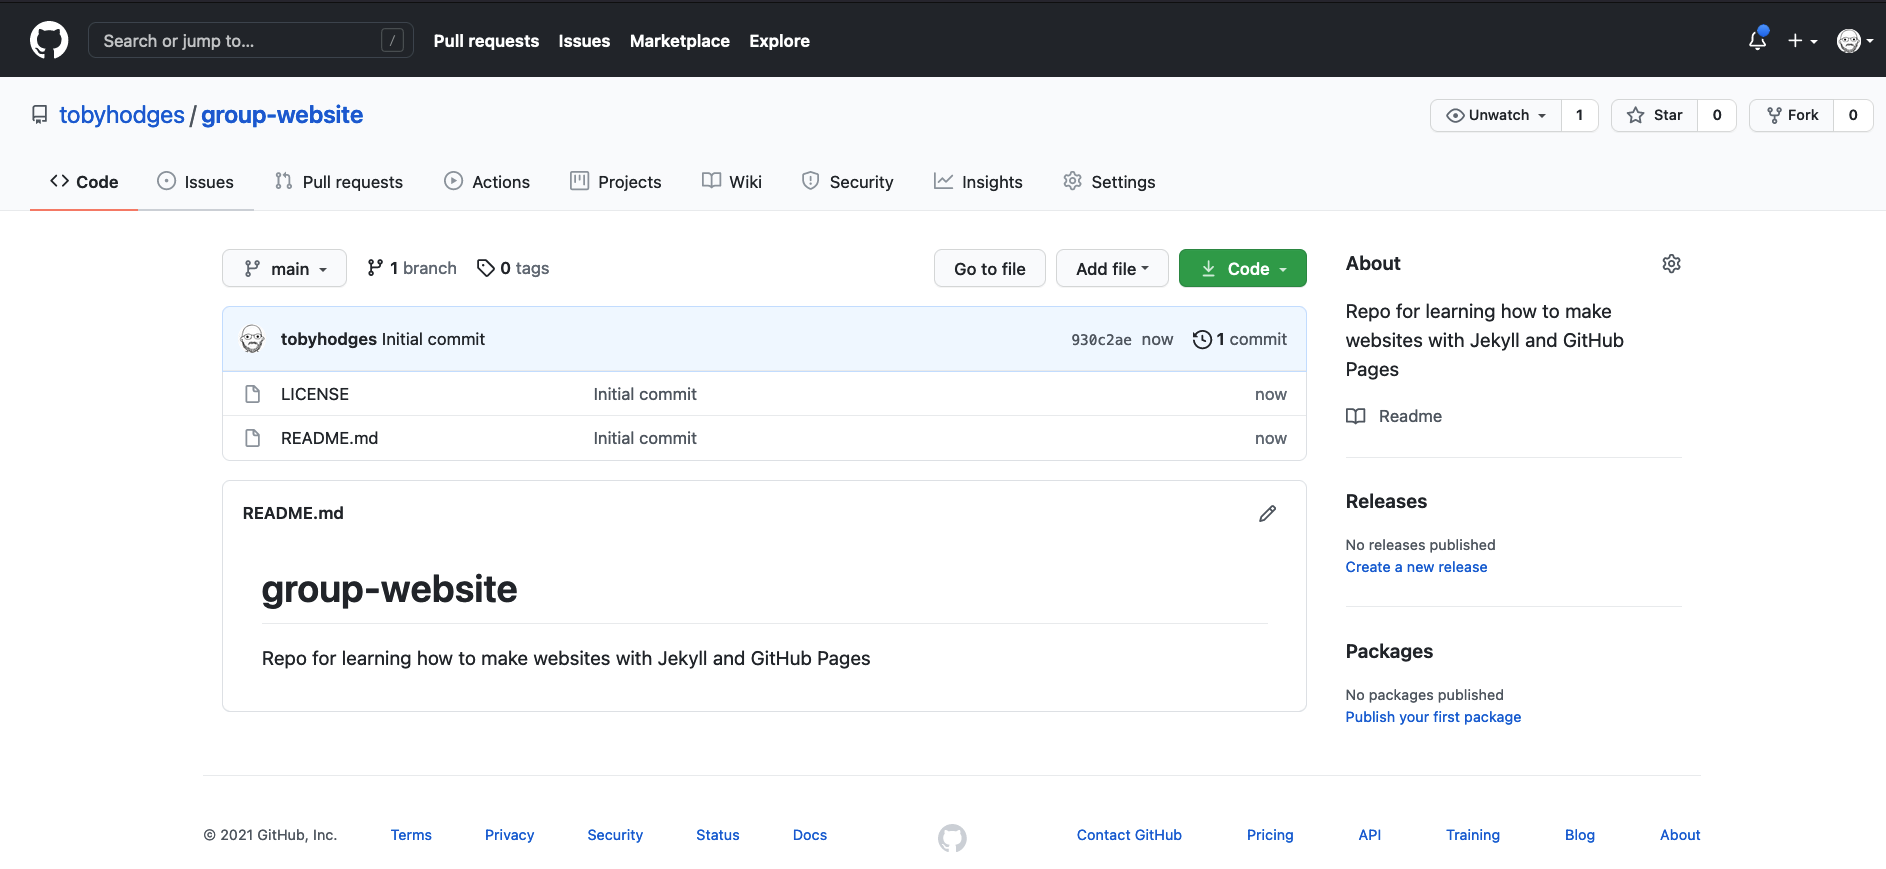
Github repository for the group website
Hosting Websites on GitHub
Figure 1
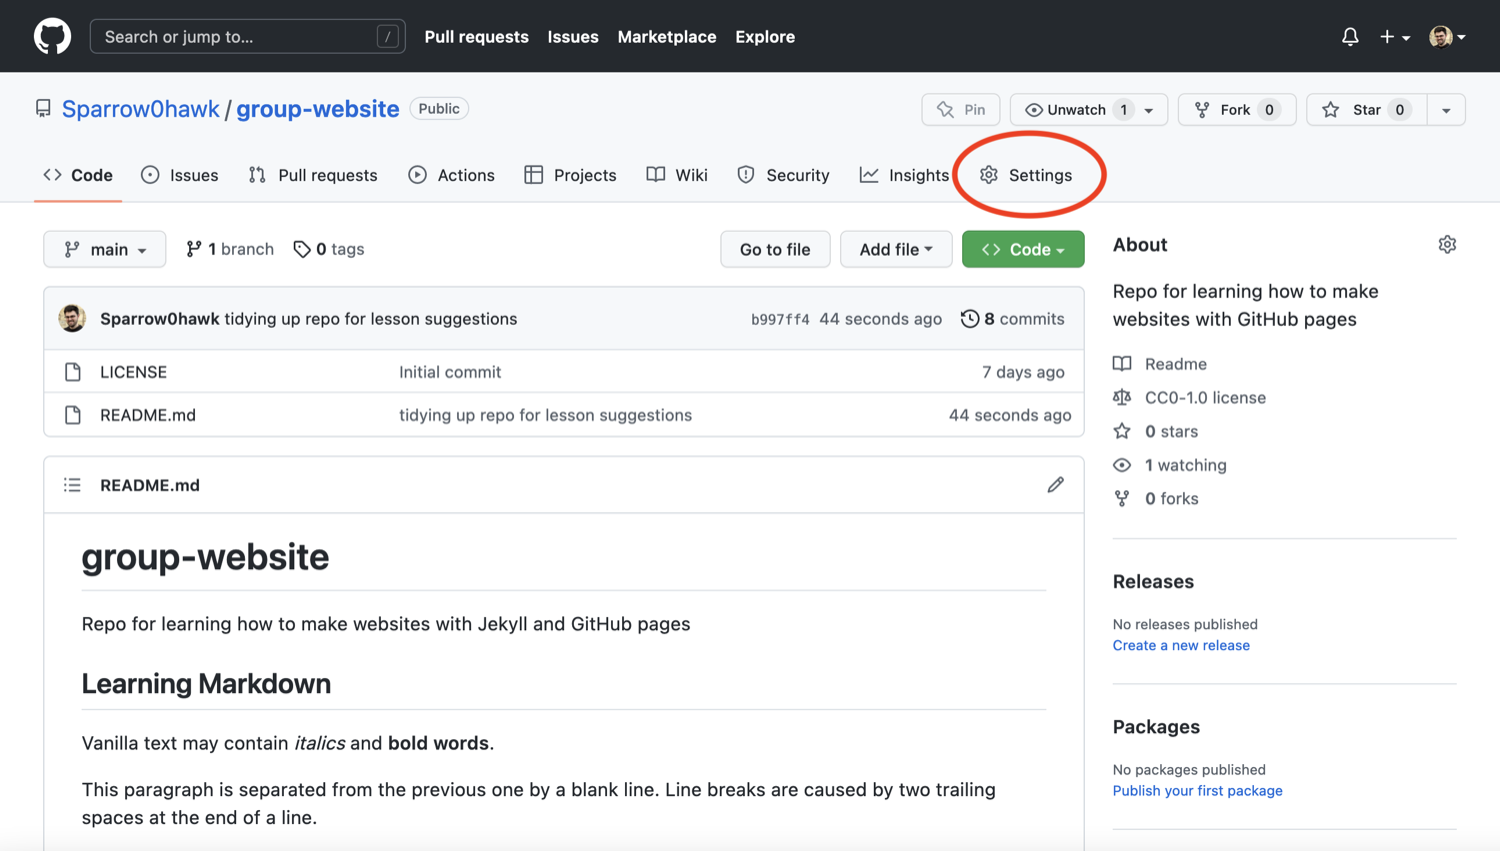
Repository ‘Settings’ button in GitHub
interface
Figure 2
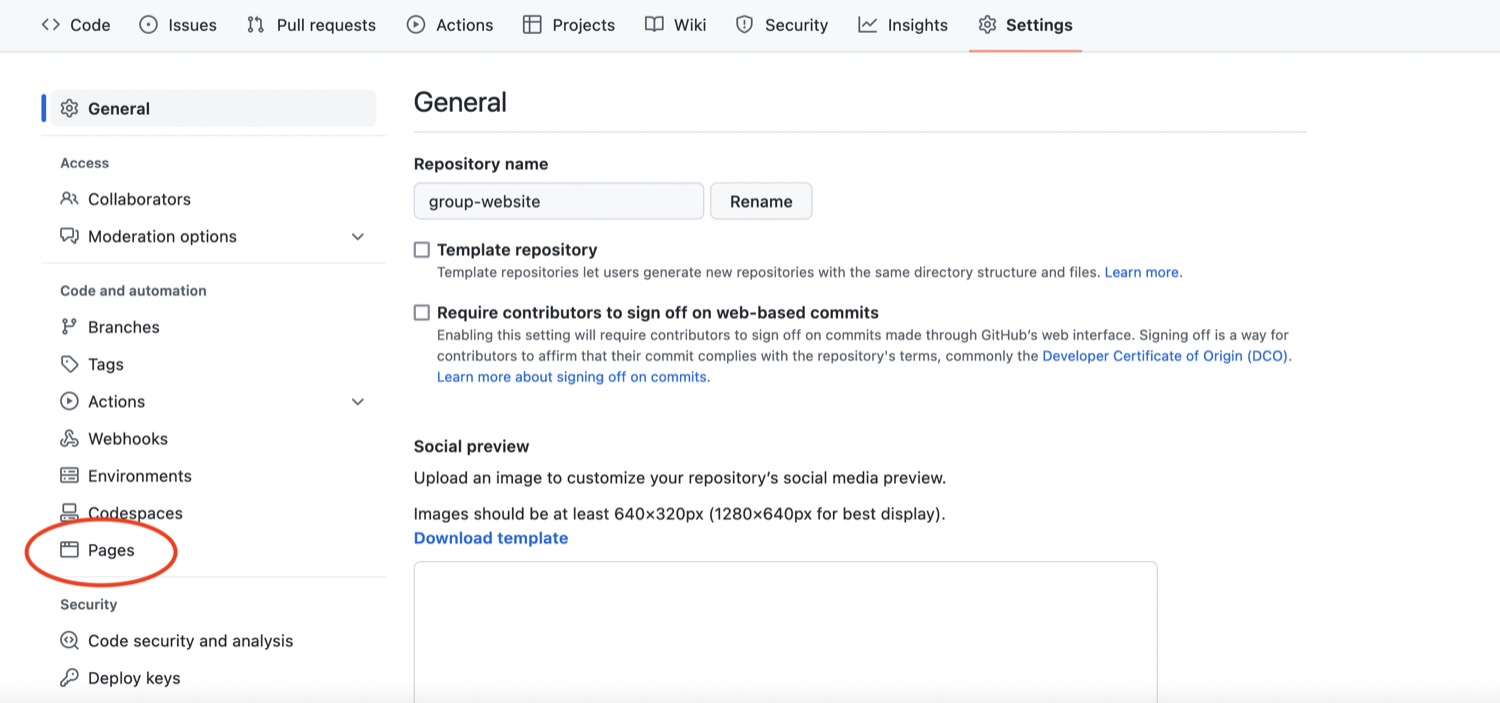
Select ‘Pages’ tab in repository settings
Figure 3
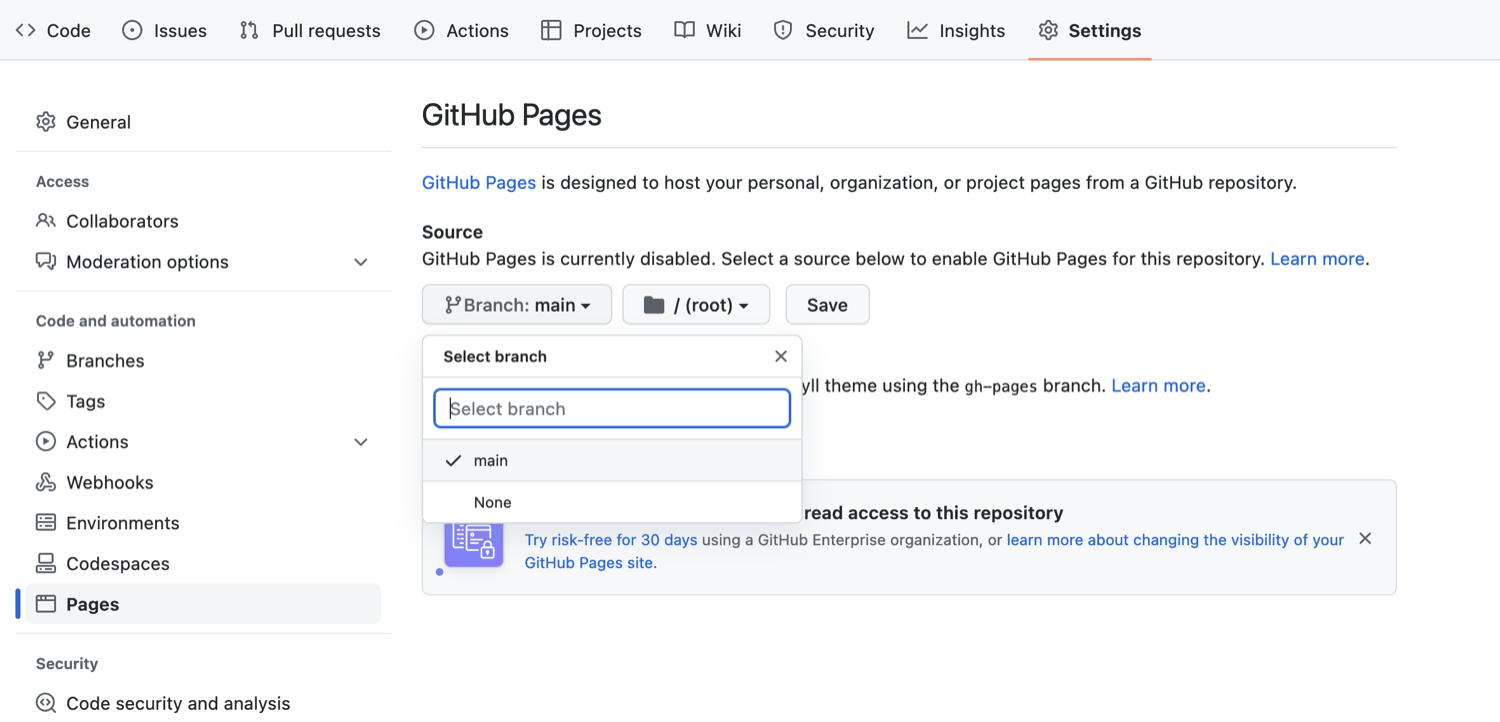
Set default branch for the website in repository
settings
Figure 4
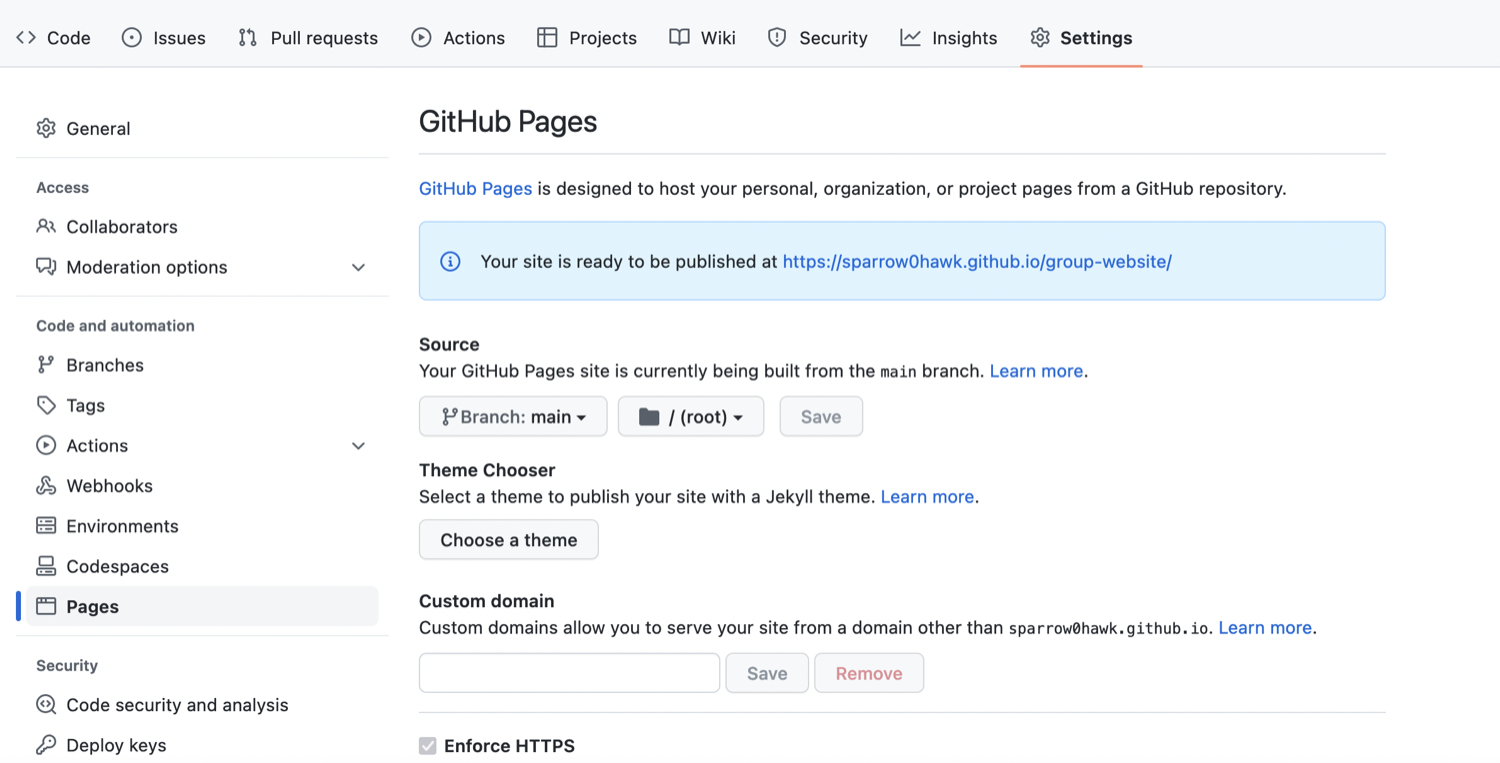
URL where the project website will be published
by GitHub Pages
Figure 5
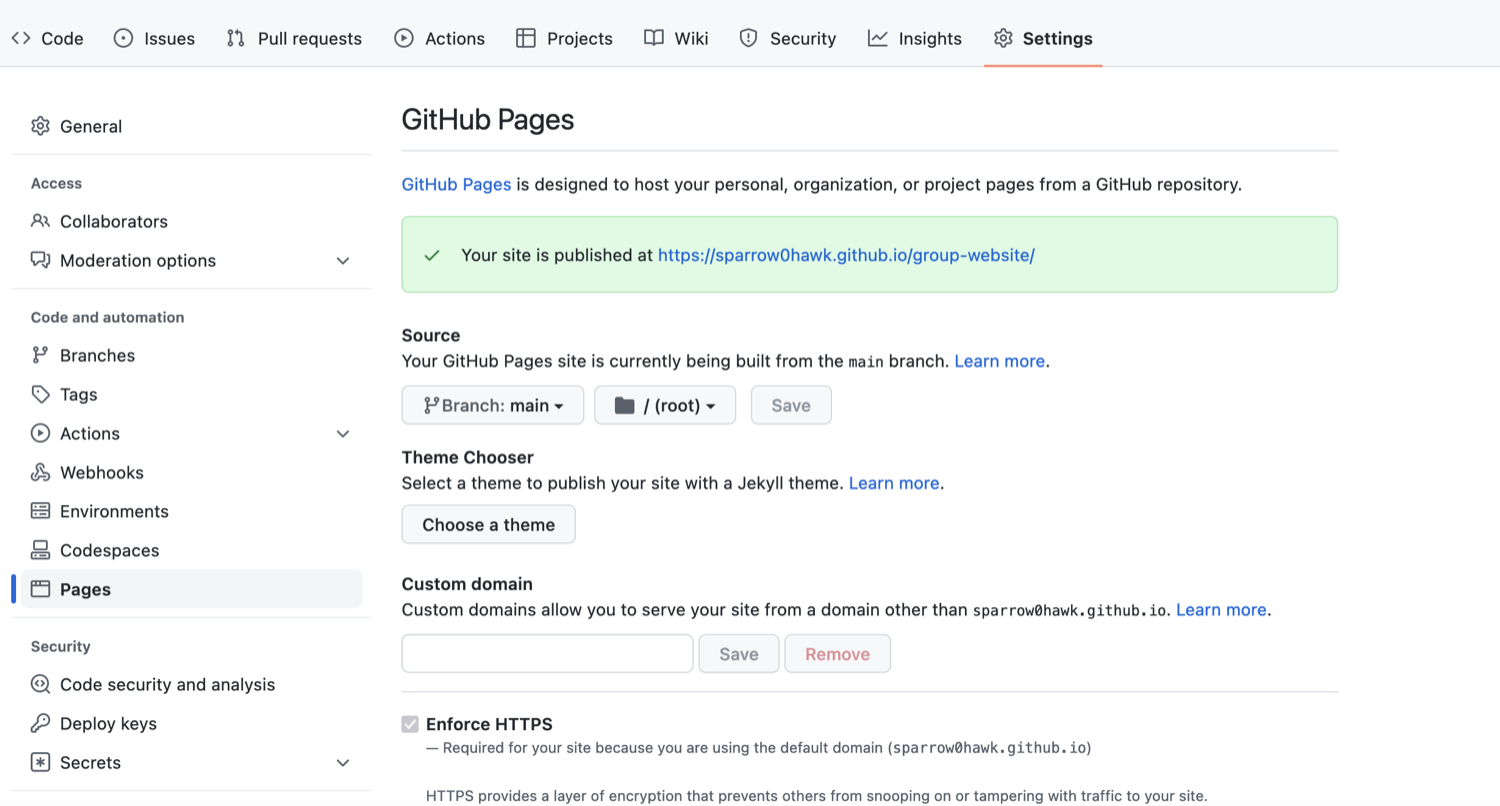
Project website URL - indication of a successful
build
Figure 6
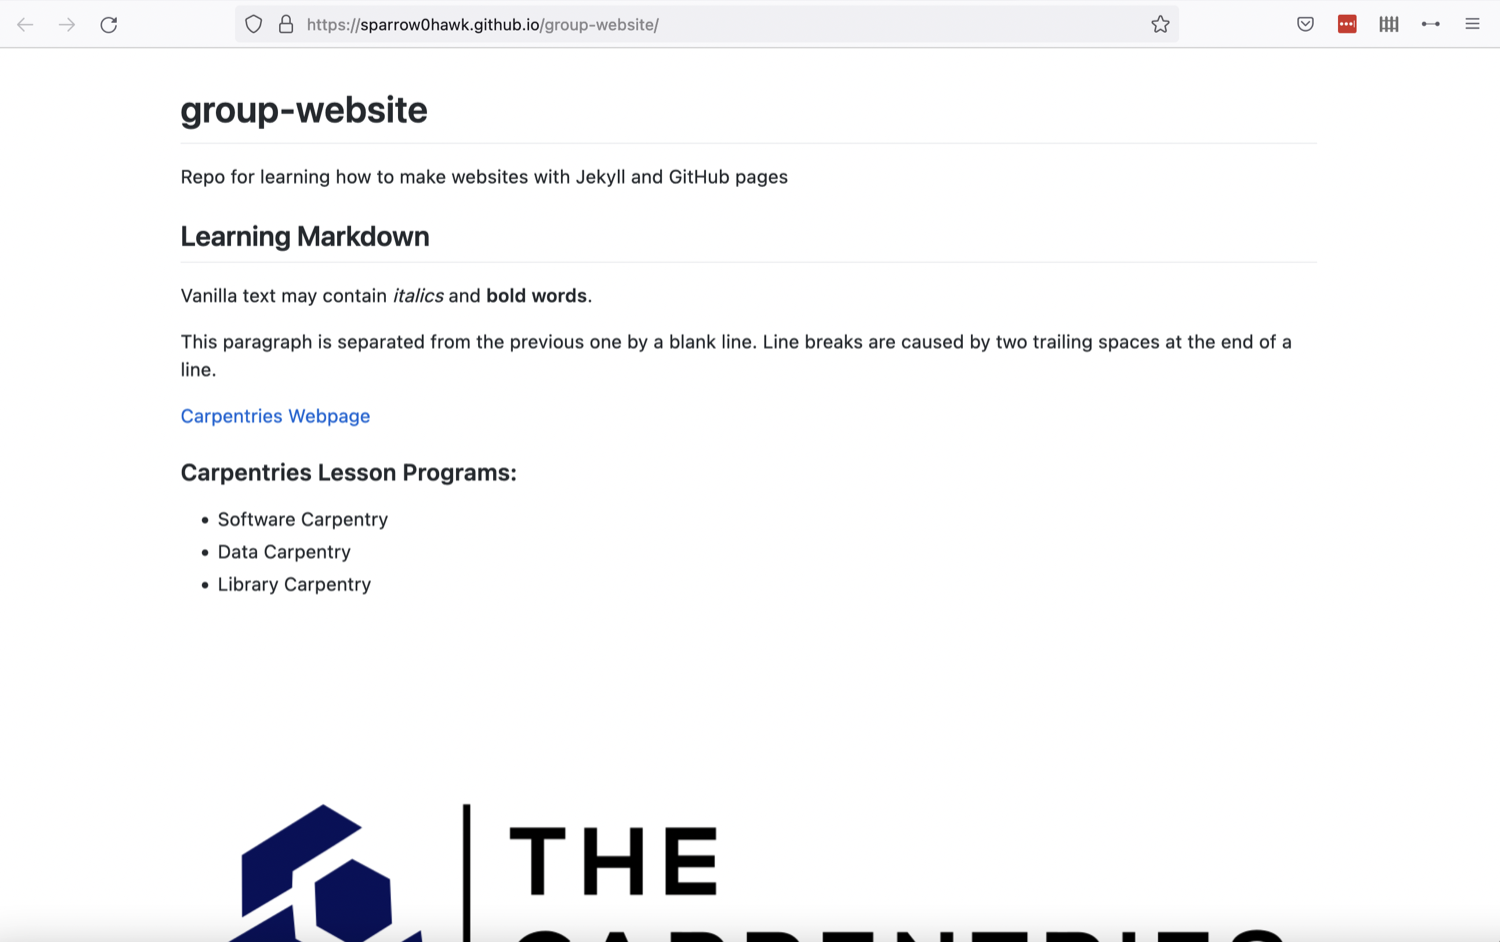
Our first website rendered by GitHub and showing
the contents of README
Figure 7
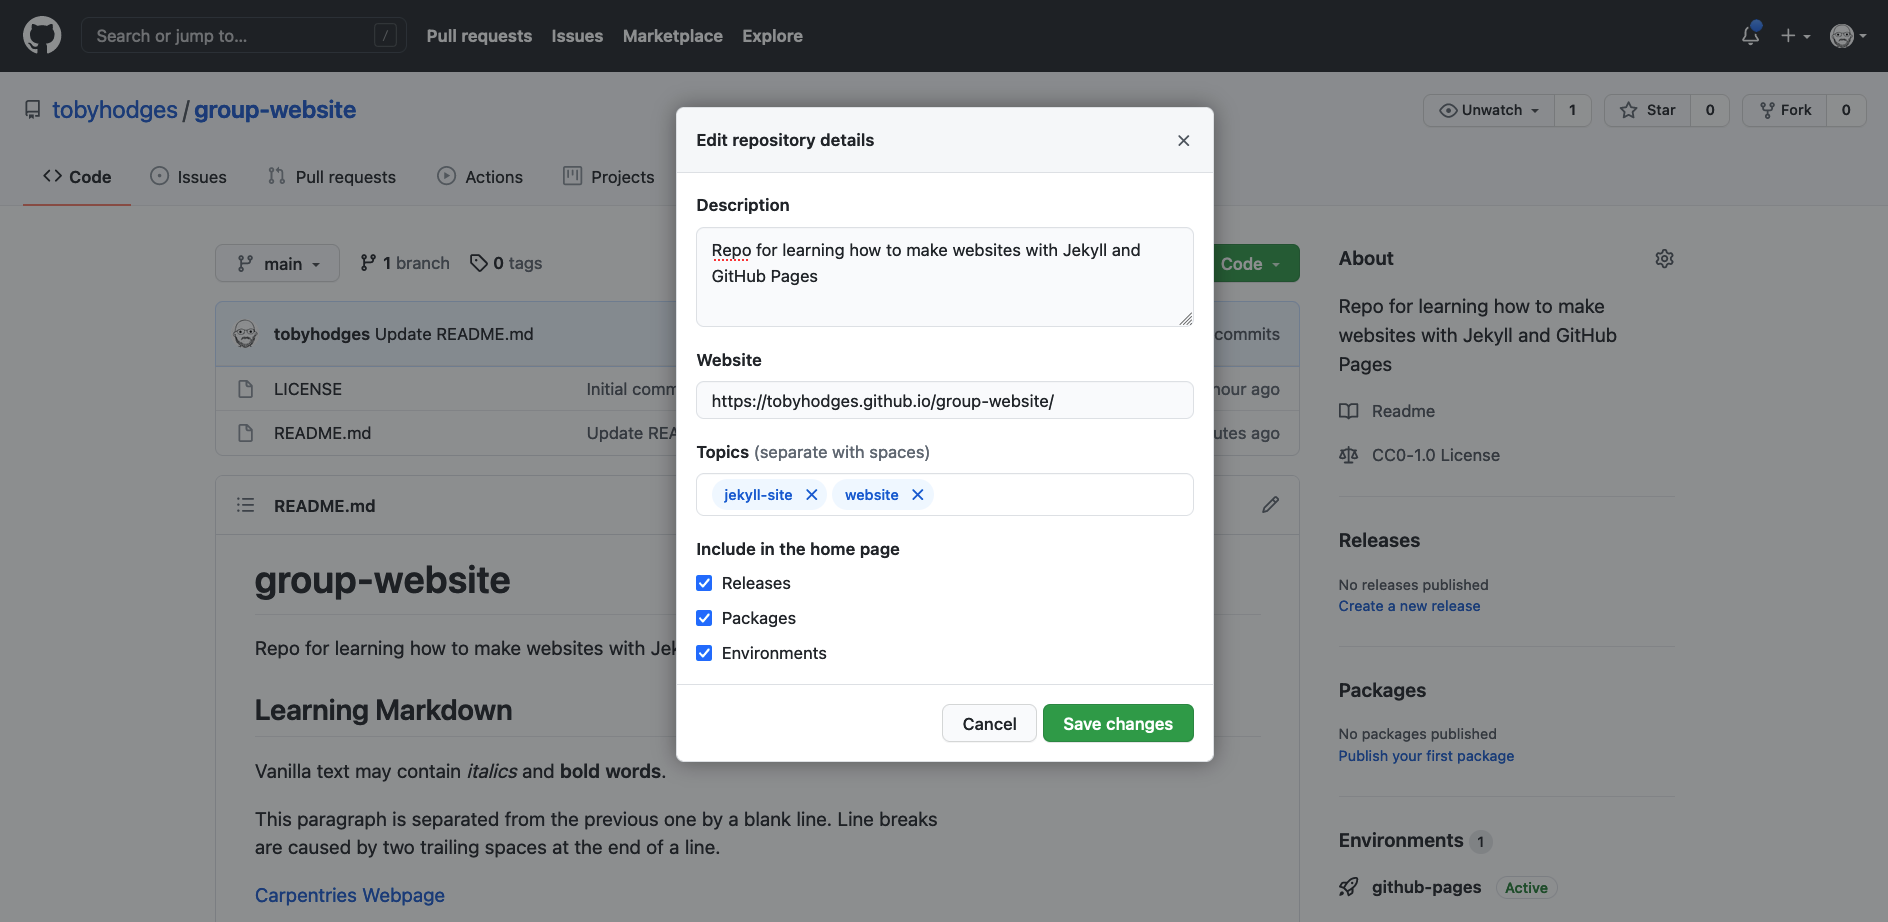
About section of a repository - edit repository
details
Starting With Haunt
Figure 1

Jekyll pending/successful/failed builds after
different commits
Figure 2
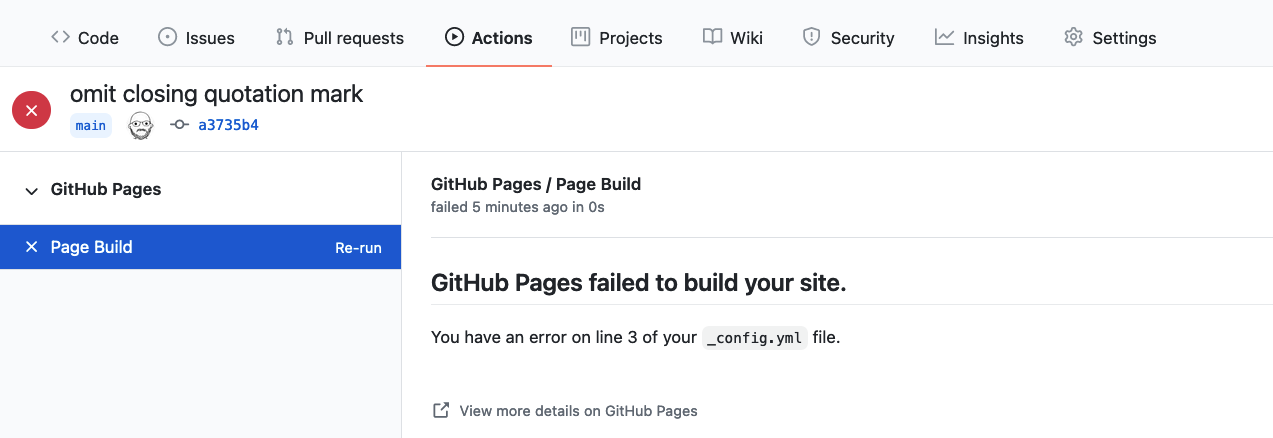
Jekyll - a failed build
Figure 3
Jekyll - error details of a failed build